Friday, October 17, 2008

Murcielago wheels, dash


We powder coated the wheels black. We like the new look.

Powder coating is a great process yielding stunning results for wheels and all kinds of parts.


Leather dashes shrink, unfortunately. Here the black leather on the dash had shrunk along the forward edge at the base of the windshield, leaving sections of the yellow structure underneath showing. It obviously did not look very nice that way. We removed the dash (not a simple task) and it was clear that not enough leather was left folded over the edge and glued down when the car was built. We sewed large leather patches onto the skimpy tabs left by the factory, both to have something to pull on and to have more leather surface area to glue down to the back of the dash. We soaked the outer dash leather, stretched it, pulled it back over the edge, glued it all down and re-installed the dash. The result was a few stretch marks in the leather on top of the dash but it looks 99% better than it did. We could have installed new leather but the car's owner didn't want to go that far and was very happy with the result.

THREE VINTAGE FERRARI ON A FALL AFTERNOON

This photo was taken as the center car, a 1965 Ferrari 330 GTS, was about to be loaded into the trailer for the trip back to it's owner. This is a really nice car for cruising around on a sunny fall day. It's not too big and not too small - a nicely sized traditional sports car with plenty of power from it's 4 liter V-12 and nice handling. It's a real pleasure to drive and to behold. I guess it's market value reflects that.

The 330 GTS was in for an annual service. On the road test we noticed a slight hesitation in the brakes. The car was raised on a lift and one of our technicians applied pedal pressure while another tech checked the brakes over and found a big bulge in the right front brake hose. New brake hoses were installed and off she goes.

The Ferrari on the right is a 1963 250 GT Berlinetta Lusso (luxury coupe). It is basially a road going version of the 250 GT Berlinetta SWB (short wheel base) competition car and is one of the prettiest Ferraris ever made. It's a nice little car with a 3 liter V12 and early disk brakes. Unfortunately it's a bit cramped for my 6' - 2" frame but that's not the car's fault.

The Lusso is in our shop for some work on the fuel system, cooling system, steering and electricals and is about ready to go home also.

The silver Ferrari on the left is a 1975 365 GT4 BB (Berlinetta Boxer) It has a horizontally opposed 12 cylinder engine which is the reason for the Boxer name since the two banks of pistons move back and forth, towards and away from each other like boxing gloves in a fight. This is considered the first mid-engine Ferrari. The 246 Dino came before it but at the time the Dino was considered a separate brand by Ferrari management. This was a fast car in it's day and is still no slouch. I'm told this car was actually displayed on the Ferrari stand at the International Auto Show in the old Coloseum. I think the CNN building stands there now but I remember many exciting trips to the Coloseum to see the latest offerings.

This car is here for a partial restoration and is very close to completion.

Wednesday, October 08, 2008

Waiting

This 1959 Jaguar XK 150S roadster was found in a barn in Texas, with a bullet hole in the windshield. Now spot free from rust and protected in primer, it waits. Has been waiting in our barn in NJ for 8 years for restoration work to resume.


How much longer before it looks like this?


I heard that Clint Eastwood had one of these too in the early '60s (probably without the bullet hole).


- posted by Sandy

Saturday, October 04, 2008

Happy ending for burned Lamborghini Diablo


We are in the final stages of a 3-year reconstruction of a Lamborghini Diablo roadster which suffered an engine fire. Originally a silver car, the engine was toast and all rear body panels, hoses, wiring, etc melted. Now with new metal flake yellow paint, rebuilt engine, restored frame, we are just performing a final service. We can't wait to send this car home.


Saturday, September 27, 2008

Garden State Ferrari Festival


Before September turns into October, here are photos from this year's Garden State Ferrari Festival, held September 14 in Florham Park. We were there (2nd to last photo, lower right; note my new Ferragamo handbag!) with our black 1978 supercharged Euro Ferrari 308GTB (last photo).

There were about 200 Ferraris, from Enzo, to late model and vintage models. The facilities for a show like this are great - 4 tiers of blacktop and good landscaping - all the cars looked their best. The weather was hot for mid September - but better sun than rain.

Despite the allure of marvelously restored older Ferraris (a 1961 250PF Cabriolet took Best in Show and numerous other awards), my personal favorite was a 430 Spyder painted an unusual tropical orange/red. (5th photo) Tamale red? What do I know, I just know what I like!

Note: these photos were posted at the exoticsrally.com forum and reposted here with the photographer's (Brent Mathews) permission. More photos can be found on this thread at Exotics Rally: We didn't bring our cameras, just strolled around enjoying the day. Fun.

Many thanks to Dave North of the Penn-Jersey branch of the Ferrari Club of America for painstakingly organizing once again a hugely successful occasion for Ferrarista.

- posted by Sandy

Sunday, September 21, 2008

1952 Aston Martin DB2 hits the road

Aston Martin, the company, has been hand building cars for discerning buyers and winning races since the early twentieth century. The DB models came after World war II when Aston Martin was bought by David Brown. The most famous Aston Martin is probably the DB5 driven by James Bond in the mid sixties.

This beautiful DB2, built in 1952, came to our shop a few years ago needing some repairs but as we started working on it one frightening thing after another was uncovered. Part of the chassis had rusted away, every bearing journal on the crankshaft was a different size, every single spoke in the wire wheels was loose, the bonnet (hood) had been crash damaged and badly repaired several times apparently (requiring extensive aluminum body panel fabrication) and the list went on.


She runs and looks like new now and it's easy to forget the challenges we ran into along the way. For example, this car has 3/16" flat glass in the doors. New windows were required and usually we have flat windows cut from safety glass from a local supplier. Apparently 3/16" safety glass is no longer available. Quarter inch wouldn't fit so we tried 1/8" but as soon as we started road testing the thin glass started cracking. The only other choice was 3/16" tempered glass (like the original equipment) but having tempered glass windows made is a bit more complicated. New windows were cut and sent out to be tempered (for strength) and one exploded in the oven. Later when we finally had the new side windows in our possession, one of them had been made a hair too wide and would not fit. Safety glass could have been trimmed on a special belt sander at the glass shop but that is a no no with tempered glass. It shatters into a million little pieces. Lucky for everyone we were able to make adjustments inside the door.


Radial tires, electronic ignition (Pertronix retro fit kit in the distributor) and a Bosch coil were trade-offs to make this classic more fun to own. The wood rim, aluminum steering wheel is also not original but adds a nice touch to the interior.

The lazy speedometer was fixed with some judicious cleaning and a drop of real whale oil in the right place.


Arnolt Bristol @ Buckingham Auto Show


Here's a few photos of a customer's award winning 1954 Arnolt Bristol last weekend at the Buckingham Auto Show Concours d'Elegance. Here is a blurb about the Arnolt Bristol from Sports Car Market Magazine:

"The Arnolt Bristol was the obsession of engineer, industrialist, importer, and sports car enthusiast Stanley “Wacky” Arnolt. He made his fortune building marine engines during World War II, and, seeing a market for sports cars in America during the early 1950s, cut a deal with Bristol to use an updated version of its 400 chassis, designated the 404, to build a sports car. Bertone supplied the bodies, and the Arnolt Bristol went into production in 1954. The racing version, called the “Bolide,” did not come with a top, carpeting or adjustable seats, and windshield wipers were optional. “DeLuxe” models had all of those features and a different dashboard design with the instruments in front of the driver. A coupe completed the model line-up, though just six were built before production ended in 1961. Only 142 Arnolt Bristols were constructed in total, 12 of which were destroyed in a Chicago warehouse fire. An estimated 75 cars survive to this day...."


Here is the background of the Buckingham Auto Show from their website. This mid-September annual show is worth a visit :

" The Buckingham Auto Show is the brain child of Al Pincus and Ralph Tompkins, who became concerned with the loss of farm land and open space in Buckingham Township.
They presented their idea of an antique auto show and dinner annually to raise funds to purchase farmers development rights to the Board of Supervisors five years ago.
The show has been a huge success, manned totally by volunteers and the Fund has been recognized by both the State and Federal Governments and granted status as a Pennsylvania charity and a Federal 501(c) 3 tax free entity.
"


Posted by Sandy

Monday, August 25, 2008

NJ Motorsports - FUN DAY!

We had an awesome time yesterday at the brand spanking new NJ Motorsport Park in Millville, NJ . Organized by the relatively new tri-state based Exotics Rally About 100 exotic car owners turned out for this charity run from Edgewater NJ to south Jersey to tour the phenomenal new raceway, so new the grass hasn't even started growing. Here are a few pics from the day. Visit the exoticsrally.com website for more and info on how to participate in future events.

Following a snail's pace tour of the new Thunderbolt track the guys had their jollies doing some blood thirsty go karting at NJMP (see last pic of Wil behind the wheel getting ready to wreck havoc).

Car shows are fun too, but these cars are meant to be driven and we certainly had fun in our vintage supercharged 308GTB alongside new Murcielagos, Gallardos, some Diablos and a host of Ferrari, Porsche, Lotus, Corvettes, BMW, Bentley, Acura and Vipers.

Posted by Sandy


Wednesday, June 25, 2008

2008 Belle Macchine d'Italia at Pocono


2008 Belle Macchine d'Italia at Pocono. Check out this blog for an interesting write up and veeerry nice photos of this year's event.

Saturday, March 29, 2008

Ferrari Club 'Spring Fever Run'

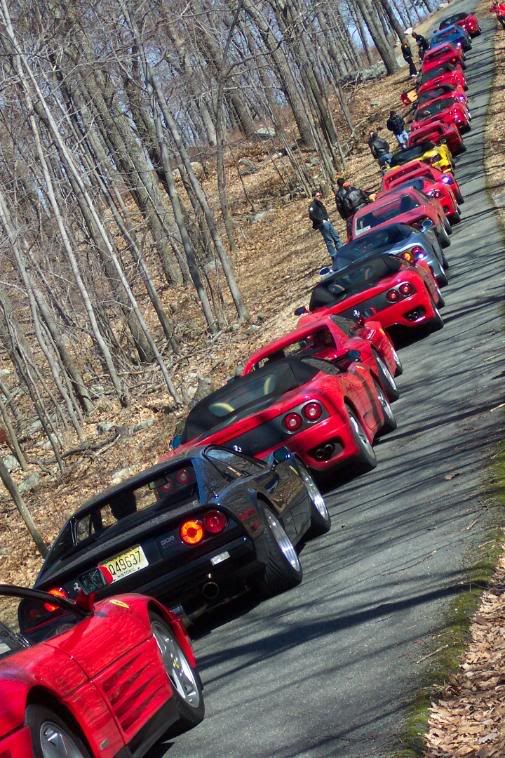
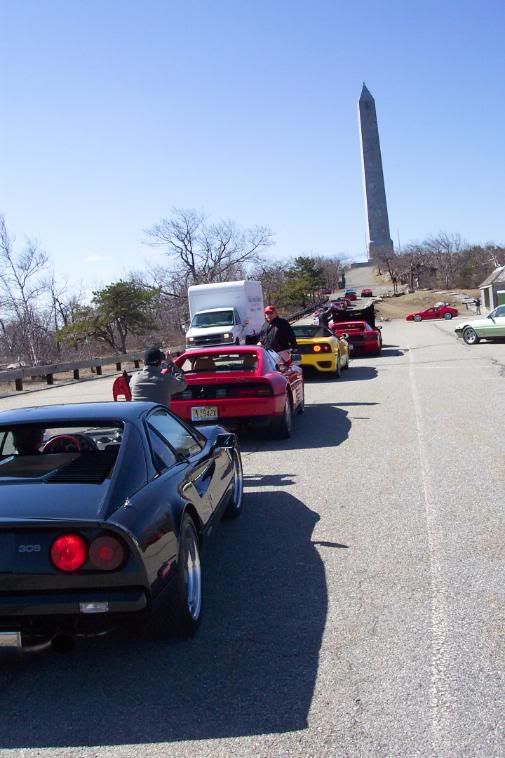
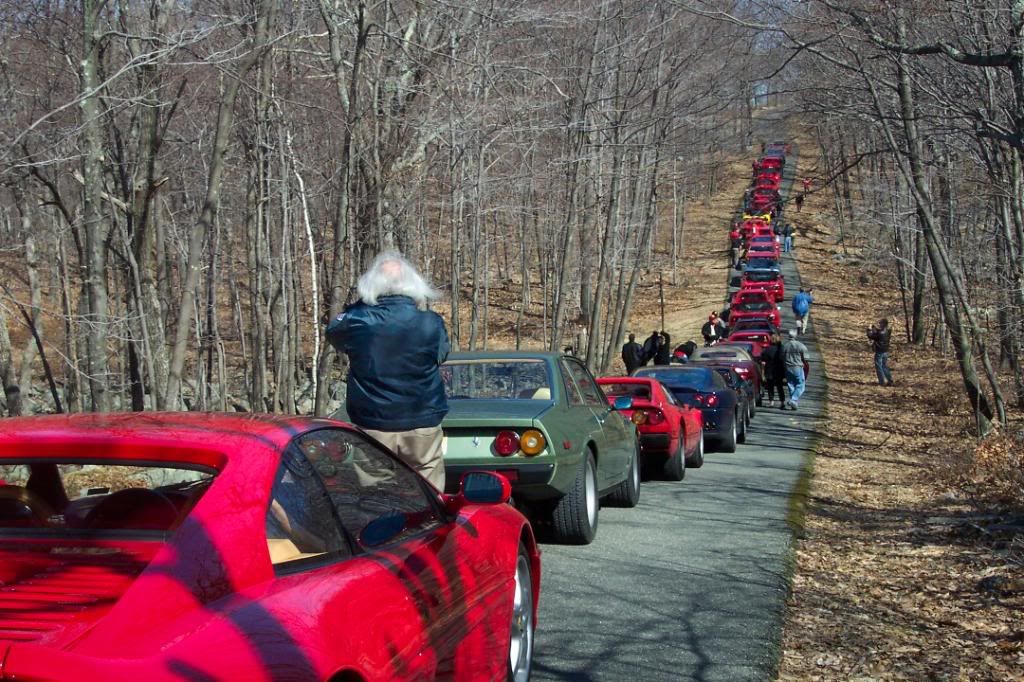
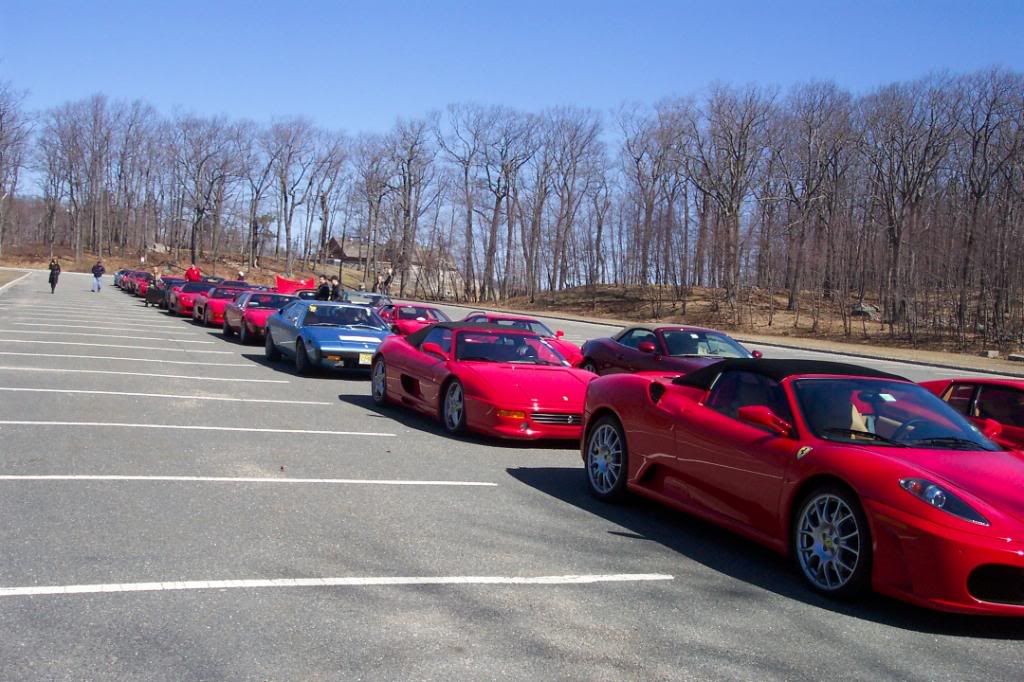
We drove our 1977 308GTB 70 miles to gather with 25 other Ferrari owners for a late March drive up to High Point State Park. Anyone else have spring fever?


Sunday, December 16, 2007


One of our latest projects is this 1960 Fiat Abarth with a hand made aluminum body by Zagato. I flew to France last spring for a long time client to perform a PPI (pre-purchase inspection) on this car and actually rode around in the streets of Paris with this car. Our client was able to negotiate a purchase after the inspection and the little car arrived at our shop in Frenchtown NJ a few months later by sea container.

The car had been refurbished in the not too distant past so it didn't need a so called "frame off" total restoration. The exterior re-paint was actually not bad, over-all, but several areas of the body showed signs of swelling under the paint. Removing paint and filler from the offending areas revealed pin holes in the aluminum, caused by galvanic corrosion between the aluminum skin and the steel skeleton. These pinholes had been filled with polyester body filler during the previous work. This is a no-no since polyester filler will absorb moisture if it is not completely sealed front and back. The filler was pulling in moisture from the back-side and swelling up.

To avoid damaging the minimal upholstery inside, the whole interior was removed.

(Post by Wil de Groot)

Thursday, December 06, 2007

Hello Paul


We welcome Paul Weinberger, our new fabricating guru. Paul has an expert background in restoring vintage racecars: Bugatti, Ferrari, Maserati, Alfa Monza, Miller, Pre-War MGs, Allards, Pebble Beach contenders and other vehicles with provenance. But can he blog...?

Paul is putting the finishing touches on the Aston Martin DB2. We're just waiting for all the refinished chrome pieces to be reinstalled and then the car will be on its way home.

Saturday, November 03, 2007

Goodbye Randy....

We said goodbye to Randy Tartanian, who penned the majority of our blog since its inception in late 2005. Future blogging will be by Wil or Sandy de Groot. Thanks for your good words, Randy, and good luck.

Wednesday, June 13, 2007

Aston Martin Back From Paint


The DB2 is green! Having color on the car is obviously a huge milestone in any project. Now we can see the result of all that preparation.

The body has already been color-sanded. The final grade of sandpaper used is 2500 (that means 2,500 ‘grits’ per square inch’) but then the paper gets turned over. Yeah, the backside of the paper is used to start the polishing process. You might laugh but it really makes a difference in the ease with which the paint buffs up. And by the way, the careful technique that was used earlier while blocking the primer flat still applies even though the sandpaper being used is so much finer. Many good paint jobs have been ruined by careless color sanding.

Compounding (the color sanding scratches are removed) is followed by polishing (the fine haze or, ‘swirl marks’ left by the compound are removed) and the result is a deep, sharp shine.

Why is so much time, money and attention given to wave-free body work and perfectly level, shiny paint? It’s only when the surface of the paint is free from waviness and the defect known as ‘orange-peel’ that the lines and curves of the car can be fully seen and appreciated.

So even an admittedly dated design such as the DB2 looks striking when you stand back and see the way the lines and curves flow and blend.

We still have to paint the firewall and chassis before we can start reassembling.

Friday, May 25, 2007

More on the Aston Martin DB2


More on the Aston Martin DB2

The DB2 is nearing the end of the body work phase. We removed the finish and the underlying filler to bare aluminum. We fabricated new panels to replace parts that were beyond repair. Spray polyester was applied and block-sanded to achieve a wave-free surface.

The bonnet was particularly time-consuming. This is a large, complex piece that hinges at the front to reveal the entire engine and front suspension. It was necessary to fabricate components of the mounts and hinges for both cosmetic and structural reasons. This led to countless installations and removals to confirm fit. Adding to the critical nature of the bonnet is the fact that the inside surface is completely visible to scrutiny when open.

The original color was a rather weak metallic green. The new finish will be British Racing Green. BRG, as it is called, does not represent a specific paint formula. While many manufacturers offered a color by that name, Aston’s version was not identical to that of Jaguar or Triumph or MG. Anyway, this car is going to look stunning in this deep green color.

About the original finish, or I should say, the finish we removed as part of this project; the paint was shiny enough, but as you can see in the picture where the green is being removed in sheets, not well-applied. This appears to me to be the result of sanding the primer with too fine a grade of sandpaper prior to painting. The result is that the topcoats have nothing to grip to and over time this finish would have failed prematurely.

Next we applied primer, performed a lot of wet-sanding, then sent it off to the paint shop. Here is the DB2 back at our shop after wetsanding the final color:


Thursday, March 22, 2007

Pantera - progress


Pantera progress

We have made considerable progress on the Pantera. New fenders, door skins, rocker panels and quarter panels have been fitted. It might seem like it should be a simple job installing all this new sheet metal. If this were a mass-produced car it would be a relatively easy task. The first fender that GM produced for, say the ’69 Camaro, was for practical purposes identical to number 10,000. Not so for the Pantera or any other hand-built exotic.

I never actually saw any of those Italian craftsmen building these cars. I have to imagine that Luigi’s fenders were maybe just a little different than Giuseppe’s. Enough so, so that one is not interchangeable with the other. Not at least without a little, or a lot of, massaging.

So it’s a matter of install, check fit, remove, adjust, install. Repeat this until everything lines up and gaps around the doors, hood and engine cover are uniform. The panels get held together with small sheet metal screws or preferably (and if space allows) we use clamping devices called ‘Clecos’. These are ingenious tools developed for the aviation repair industry that permit the technician to repeatedly remove and install panels without having to deal with a bunch of small screws.

When we are happy with the fit of the panels the welding begins. For the most part, MIG welding is used to attach the panels to the underbody. Where the outer surface of panels join, like where the front of the fenders meet the valance panel, gas-welding will be used.

The welds get ground down and cleaned-up. This is an important step because primer will not stick to weld ‘scale’. We took the time to media-blast almost the entire underside if the car. (If you recall, this car had been dipped to remove the old finish, along with undercoating, seam sealer and rust.) We also sand off the existing primer on the new panels.

Since this is a long-term project we need to prevent rust. Two coats of epoxy primer are applied. This will protect the surface while work progresses.

The next steps will be repairing damage to the floor pans (caused mostly by improper jack placement), addressing rust at the leading edge of the hood and installing a reproduction front valance panel.

Friday, March 02, 2007

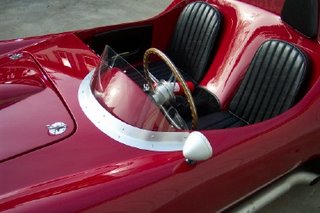
Fabricating a windshield for a 1958 Devin


This project encompasses all the skills needed to fabricate much larger pieces. We will cut, bend, stretch, shrink and weld this small item. That is everything that can be done to a piece of sheet metal whether forming a small patch panel or a complete car.

The Devin was one of many sports cars being manufactured in the fifties. This particular car lacks a windshield and the owner wants a small but functional windscreen to make driving the car less an act of self-punishment. Try taking a small stone or insect to the face at 60MPH to see what we’re talking about.

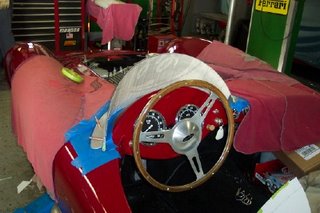
The actual shape of the windshield must foremost be aesthetically pleasing while providing protection for the driver. Since I will use the cowl of the car as a ‘buck’, the first step was to protect the area I would be working on with masking tape and cloth fender covers.

Consulting photographs of similar vintage sports cars reveals that the windshield frame will be about 1 ½ inches tall, I’ll make the portion that attaches to the cowl the same dimension. So I need to cut a strip of aluminum a bit wider that 3 inches and long enough to reach all the way around the instrument cluster pod. I measure this to be about 34 inches. We are using .063 thick material; this gives plenty to work with when it comes time to remove the tool marks.

With the strip cut and de-burred the next step is bending it the long way which basically gives us the ‘rake’ of the windscreen itself. This is a straight forward bend on the brake which I just kind of do by eye.

Now it’s time to shape the frame to match the curve of the instrument cluster pod. I’ve marked the masking tape with the smooth, sweeping curve I want to accomplish. I have to stretch the bottom flange I order to bring the ends around. This is done with the help of our stretcher (yes, the name is obvious). The jaws of this machine actually spread the metal apart a small amount each time pressure is applied to the handle. Another machine does the opposite; gathering up and thereby shrinking the material.

But the effect of stretching the bottom flange is to push the ends of the frame down. The thing that’s needed is some shrinking to bring the ends of the frame back into alignment with the marks. The thing to be aware of is that performing an operation on the work piece will cause a reaction somewhere else. So generally it’s a matter of a little back and forth to get the metal to go where it’s wanted.

Once the basic shape of the frame is complete I mocked-up the windscreen with a piece of cardboard. This will become the pattern for cutting the windscreen material later on so I made it oversize. We are ready now for the owner of the car to look things over, sit in the driver’s seat and make adjustments based on personal preference. We decide on the contours and a finished height just below eye level.

I said earlier that this project includes all the operations one can perform on a piece of sheet metal. ‘Where is the welding?’ you ask. Well, the customer wanted the left side of the frame to sweep farther back on the cowl than I had allowed for. So…I have to add to the frame, a small amount of welding but welding none the less.

The frame gets more fitting and adjusting to get it to lay flat against the cowl. Then some pick and file work to make it pretty followed with sanding to remove the tool marks left by the shrink/stretch and filing operations. The holes to mount the frame are drilled into the cowl.

The windscreen itself will be made of 1/8 inch clear polycarbonate (Lexan). This is very tough material that can be cut and drilled with ordinary tooling. After tracing the pattern onto the Lexan the piece is cut-out a little oversize on the bandsaw. This material shapes nicely with files and sandpaper so that is how the edges get cleaned up. Next, I measure and drill the mounting holes. We’ll use slotted screws because this type of fastener was prevalent in the fifties.

Here’s the completed product. We will leave the finished ‘brushed’ although we could just as easily polish it or paint it the color of the body.

Panel Fabrication on a 1952 Aston Martin - continued


The right side wheel arch was the first area to be repaired. I started by annealing a piece of aluminum. This process leaves the metal ‘dead-soft’ and relatively easy to work. The 90 degree lip of the wheel opening is formed first since this is the most extreme bend. This operation was performed on the bead-roller with some help from the stretcher. The rest of the shape is made with the shot bag, hammers and a bit of e-wheel work.

When the piece has the proper shape I file the edges nice and straight. A curved tooth body file works well here. Lines are scribed on the existing fender and cuts are made to the inside of the marks. I’ll file the opening to size so that I have a very narrow kerf. This makes welding much easier and results in an all around better job.

After TIG welding the repair panel into place the weld beads are dressed down so that the thickness of the weld is similar to the sheet metal. Now the fender can be straightened and metal-worked.