Wednesday, October 18, 2006

Strip paint

Removing paint. I will come back and comment on this later.

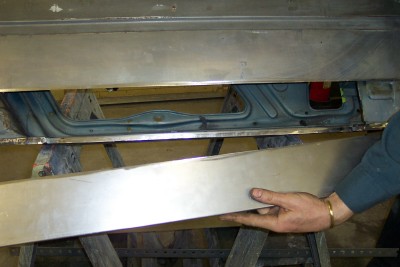
Panel Fabrication on a 1952 Aston Martin


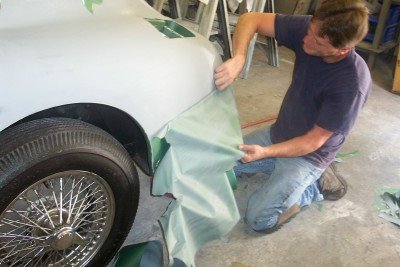
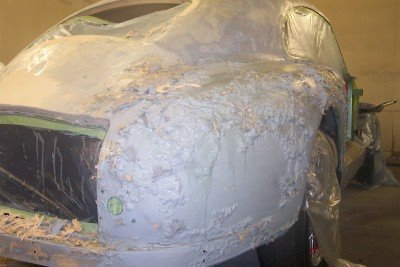
This car is undergoing a complete re-paint. The existing finish, while shiny, was not of the greatest quality. It was completely removed using a combination of chemical stripper, plastic media-blasting and sanding. We discovered that the bodywork beneath the paint left a lot to be desired (this is my way of being kind). Actually, the patron saint of Bondo must have visited whatever shop had previously worked on this car. That’s all I have to say about that.

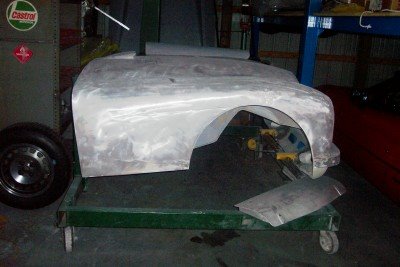
The body itself is a piece of artwork. Those Brits were masters at forming and welding aluminum. Unfortunately, the previous fifty-four years had dealt a few blows. The bonnet had taken a bit of a pounding and the repairs done over the years were not something we could apply a new finish to. Besides, the underside of the bonnet is completely exposed when open so the appearance inside has to be just as good as the outside.

We mounted the bonnet in a large dolly using the same attaching points as the car. This gave us a stable platform while providing one-man mobility.

Wednesday, June 14, 2006

The Biturbo has been painted


, color-sanded and polished and is now in the assembly stage. Many new parts are still available for these cars and the supply of good used parts is also fairly plentiful.

These cars have a considerable amount of bright-work; polished stainless steel trim which gets dented and scratched over-time. Generally, if the item is available, it is more cost efficient to buy the new one than to spend several hours repairing and polishing the original. In our case there were a couple pieces that we elected to repair because the damage was minor.

Working dents out of trim is essentially the same as metal work on a fender, just smaller. Low spots are carefully raised until the surface is level. Progress is checked by sanding using small sanding blocks, this reveals the low spots and the high spots. Naturally, the use of abrasives in this way leaves scratches which must be removed by using progressively finer grits. Stainless steel is pretty hard. Once the scratches are softened we can start buffing. This is the tedious part but worth every bit of time spent.

We will be installing the engine and the interior in the next few weeks. I was able to purchase a nearly complete used interior in good condition. Since this is not to be a show car we can save the expense of a new, hand stitched interior.

Scuff and Buff on a Cobra


This is the real thing. Even though it is not a sixties vintage car the eighties version is an actual Cobra, not a replica. This car is in good shape and just needs a little help with the paint finish.

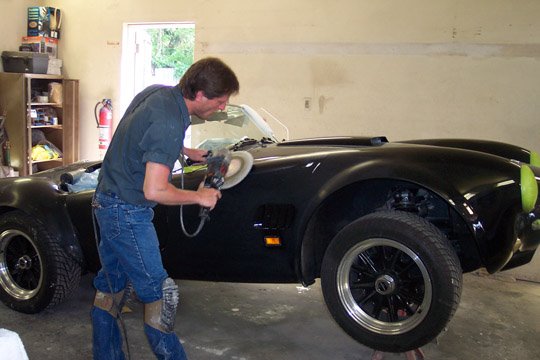
We have washed the car, removed the trim that would otherwise get in the way and wet-sanded the entire body with 2000 grit. The goal is to remove just enough material to level any orange-peel. We took the opportunity to touch-up the small chips that any car collects if actually driven on the street. I for one would rather have to deal with chips than to own a museum piece.

Carefully compounding and polishing the sanded paint leaves a brilliant shine. This job took only about two days but the result was really striking.

Wednesday, April 12, 2006


Here is a job we recently did refinishing a complete set of wheels for a 1970 Lamborghini Muira. The original cast wheels are pretty rough on these cars; the appearance is that of a bad stucco job painted flat silver.

We started by dismounting the tires. Although it is certainly possible to refinish a wheel with the tire on, the amount of work needed in this case made tire removal necessary.

While the wheels could have been chemically stripped, we decided on media blasting. Glass bead had hardly any effect on the existing finish which had a kind of gravel guard consistency. I switched to garnet, a very aggressive material which will readily damage machined parts if improperly applied.

Even with the garnet the job took what seemed like a long time. An unexpected benefit was that the surface of the casting itself was considerably less rough when I was finished. The goal here was to re-paint not to metal-finish and polish to a shine. That would have taken several days per wheel. That said, I did want to smooth-out the rougher portions of the casting. I used my die grinder along with various sanding drums and rolls to carefully remove the high spots.

The other issue concerned voids and missing material. Some of the castings on the older exotics leave a lot to be desired. We have seen oil leaks in engine blocks caused by porous castings. I used ‘All-Metal’ to fill voids and chips. This is pretty tough filler that I think will stand up well to the abuse a wheel can see. Again, I was not trying for a perfect finish; I definitely left most of the original ‘character’ as it was.

After the filling stage, it’s pretty much standard refinishing work with a huge amount of inside corners. We love sanding them, don’t we? The backsides of the wheels were prepped for paint to the same degree as the fronts.

The two-stage polyurethane silver I applied has way more bling factor than the original finish and is far easier to clean.

Thursday, January 26, 2006

DeTomaso Pantera - complete restoration


DeTomaso Pantera, an exotic name for a potent combination of ground-pounding American muscle and Italian style. An ‘in your face’ kind of car straight out of the seventies.

This car had been in storage a long time. And time had not been kind. But the owner, having been informed of the extent of the work required, was committed to the project.

A couple words in support of seemingly unworthy projects: Here’s the thing, exotics, along with American muscle cars and European sports cars, were designed for people who are passionate about cars. Since there are very few cars worth restoring from a strictly dollar and cents point of view, it is passion for the form that accounts for all the work being done on cars that a mere bean counter would send to the scrap yard without a second thought.

And another thing, it is easy to say that a specific car is not worth restoring given how much one could spend on some other car in better condition. That may be true, but that other car is always somebody else’s. Somebody else’s choice of quality, of time and money invested; everything right down to the color. So if I’ve held onto the car my Dad owned, and thirty years later want to restore this rust bucket, some other car just won’t do. Price doesn’t even show up on the radar, it’s a non-issue
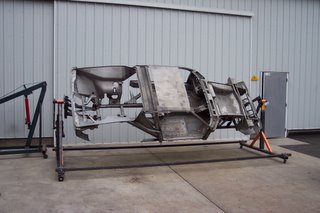

So this is a total teardown, rotisserie restoration. In fact, we determined that the 351-C was salvageable and that the ZF gearbox needed minimal work, the support structure of the unibody was sound and that it was mainly the exterior sheet metal that had taken most of the abuse, along of course with the interior.

Panteras, like most of the exotics of that age, were built with absolutely zero regard to long term corrosion protection. There are simply too many instances of dead air spaces with no allowance for drainage. Combine this with a tendency to neglect to paint or otherwise protect the inside surfaces and it almost seems like a conspiracy on the part of the Italians. You know what, they went fast and looked good and that’s all that mattered.

The crew at Exoticars-USA in Frenchtown, NJ got started completely disassembling the car down to its component parts. Phil Murphy handled the task of researching the availability of parts. He was able to order all the major panels including fenders, door skins, quarters and outer rockers.

Having obtained exterior sheet metal, the task of putting it all together is in the hands of Randy Tartanian, the resident panel beater. Fabricating inner panels out of cold rolled sheet metal is sometimes difficult when there is little of the original piece to follow. “The goal is to duplicate the function of the original part” says Randy. So using a wide variety of tools including the bending brake, English wheel, shrinker/stretcher, plasma cutter and an array of hammers, the needed panels are formed and fitted into place. Welding is accomplished with the best method for the particular job. MIG, TIG, Spot and Oxy-acethelyne welding are used.

Currently the Pantera is in the process of having the sheet metal installed. The engine is partially rebuilt and the gearbox has been serviced and resealed. The choice of color is yet to be made.

Thursday, December 22, 2005

Maserati Biturbo - more pictures


More about the Biturbo

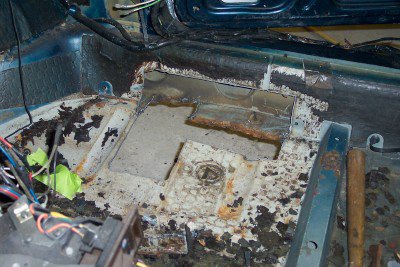
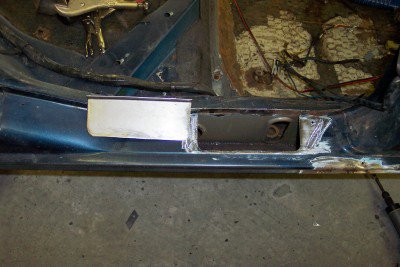
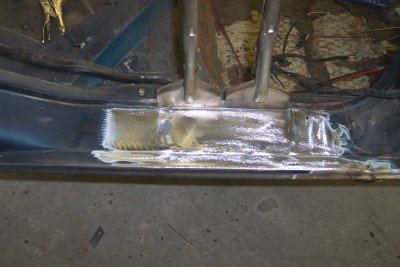
We have repaired a major amount of rust. When faced with extensive corrosion a good approach is to obtain a donor car. Rather than fabricating complicated panels and structural assemblies from scratch, it is almost always easier and less expensive to obtain used parts from another vehicle. Granted this is not always possible but in the case of our Biturbo we found a rust-free car that was being parted-out. We specified where to make the cuts so that we had plenty of material to work with. In this way we were able to replace large portions of the floor pan and adjoining rocker/sill assembly in complete sections.

The first step is to get the undercoating and seam sealer out of the way. Scrapers and propane torches work well but a great (although pricey) tool I like is the rotary wire brush available from several manufacturers. The hook shaped wire bristles are very aggressive (and re-sharpenable). I prefer to clean more than what might seem needed. Later on, during the welding and hammering stage, I have less smoke and drippy undercoating to deal with. Once the pieces are cleaned up we went ahead planning our splices.

We used existing bends, especially in the floor pans to help plan the cut lines. Also, we took advantage of the structure to help make the job easier. So instead of cutting the floor pan just anywhere, we spliced right over an existing stiffener. This gave us a readily identifiable place to cut as well as resulting in a stronger seam.

As you can see, we replaced a large section of the left side floor pan and inner rocker. ‘How did this much damage occur?’ you may be wondering. It seems to us that a few small rust holes opened up high on the firewall. This allowed water to run inside the car which was combined with a long period of outside storage (never a good idea). And of course ‘rust never sleeps’. Quietly doing its job 24/7, happily providing work for those of us foolish enough to go into the auto restoration business. That and, of course the fact that the car was built by the Italians. It must not rain in Italy.

After the welding and grinding were done we applied two-part urethane seam sealer liberally. I’ll back-up here and mention that inside surfaces were painted with either rust encapsulator or zinc-rich weld thru primer prior to welding. We anticipate a tough life for this car so the floor pans and inner sills got two coats of ‘Rustoleum’ enamel. Not historically correct but then this is not to be a museum piece.

The bottoms sections of all fours doors were re-skinned. In addition, I had to fabricate the bottoms of the door frames. Is there polyester filler (bondo) on these doors? Yes. Modern fillers mixed in the correct proportions and applied and used properly, that is, among other things; nothing thicker than 1/8 inch and never forming an edge, will last practically forever. Metal finishing a panel to near perfection takes a lot of time, time that may not be warranted.

After all the body work is flat and sanded with 180 grit, the car gets washed with wax/grease remover followed by a coat of self-etching primer and three coats of surfacer. That’s where we are now. The car has been allowed to dry for over a week so the next step is dry blocking the surfacer with 220 grit on the longest sanding boards practical

Ferrari Daytona


Refinishing the cowl panel on a Ferrari Daytona

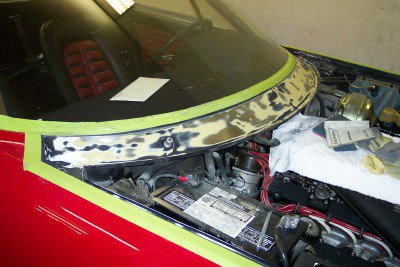
The cowl panel on this car detracts from an otherwise clean vehicle. The area between the windshield and the engine bay has suffered several amateur spray can touch-ups and looks rather shabby.

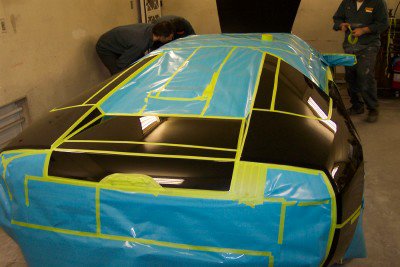
After removing the windshield wipers and washer nozzles I applied masking tape to protect the brightwork around the windshield and also the painted surfaces of the fenders. I definitely do not want to be painting body color or trying to buff sand scratches out of the trim.

The older Italian cars often have some kind of seam sealer applied to fill the gap between windshield moldings and the adjacent body panels. I needed to carefully cut and scrape to remove what appeared to be black silicone. Now I’m ready to start sanding but first I cleaned the whole area with wax and grease remover. That done, I sanded off several layers of flat black paint. The area was too small to use air-powered sanders so I just worked by hand. Starting with 100 grit and finishing with 220, I ended up removing almost all the existing paint and primer. I should mention that I dry-sanded in an effort to reduce the potential for making a mess in an otherwise tidy engine compartment.

Satisfied that I had a good surface to accept primer, I chemically cleaned the area again before masking-off the engine bay, fenders and windshield. The whole car has to be covered to prevent overspray. (Not like in the bad-old days of lacquer primer, that stuff was practically dry as soon as it came out of the gun.)

After a third cleaning, I applied two coats of high-build primer/surfacer. Tomorrow I’ll sand the primer and prepare for paint.

Murcielago exhaust


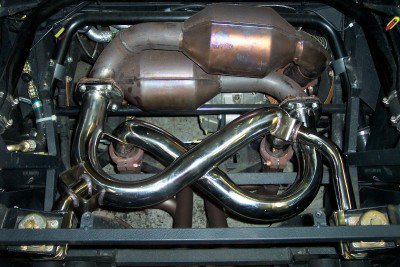
Back in 2005 when this car came in, all Murcielagos were under warranty. As an indepent shop, we were happy to install Hamann wing and spoiler, upgraded Quicksilver stainless steel exhaust and an ECU upgrade which necessitated using LaRA-AS factory software to ensure the engine and all sensors were performing correctly.

Lamborghini 400GT 2+2


Hard start problems on a Lamborghini 400GT 2+2

This is a pretty car that is in great condition and doesn’t need any body or paint work. I just think it’s got a striking look. As far as I’m concerned Lamborghini styling never got better than this.

This car is in the shop because of hard starting problems. The tech on this job performed an inspection and compression check and, given the good compression numbers, feels the car should perform better than it does. The older cars, more often than not, have problems with carburetor and distributor adjustments. After all, many technicians (previously known as mechanics) have never had to adjust a carburetor and have never even seen a set of ignition points. What the heck is dwell angle?

We will probably do a complete tune-up, set valve lash, adjust cam timing, put the distributors on the machine to make sure the advance curves are correct and adjust the carbs or possibly rebuild them.

Wednesday, December 21, 2005

Rust


Here we are repairing some fairly extensive rust on a Maserati Biturbo as part of an overall restoration. The bottoms of all four doors need to be patched. This includes the inner doors as well as the outer skins.

I rough-cut the rotted areas to get an idea of how big the patch panel will need to be. Cut a piece of sheet metal a little oversize and fabricate the required features. These particular doors have a simple shape to the bottom of the inner structure and only need the pinchweld flange bent to the proper angle.

Somewhere in here the dirty work has to get done. I’ll clean the insides of the door with scrapers, wax and grease remover or lacquer thinner to remove all traces of sound deadener, undercoating, body wax, whatever, because that’s just the way it has to be.

I will install the doors several times during the process to test the fit of the outer skins before trimming the patch panels to their final dimensions. Whenever possible I like to lay the oversize patch panel over the area and then cut the panel and the original sheet metal to size in one step. I find cutting a straight line with a cut-off tool really hard to do so this is where a good plasma cutter pays for itself in saved time and reduced aggravation.

The patch panel and the original metal need to align without significant force having to be applied. The price of a poorly fitted panel is warpage and distortion which will need to be straightened later on. I always have to remind myself not to take shortcuts at this stage.

And now, onto the welding; I learned the art of hammer welding many years ago and am constantly amazed at how well the technique works. Of course the method was developed when automotive sheet metal was considerably thicker and access to the backside of panels was considerably better but is still to my way of thinking the best way to join two pieces of sheet metal. I also really like the whole oxy-acethelyne ‘thing’. The flame, the sparks, the occasional 2nd or 3rd degree burn. It’s just so macho in a way that TIG will never be.

So, once the welding is done all the slag and oxidation have to be removed. I use the usual assortment of wire brushes followed by a good scrubbing (inside and out) with chemical rust remover. This stuff will remove the last of the welding residue and provide a phosphate coating to protect the surface from rust.

After all that I’ll move to the good old hammer and dolly/pick and file stage to finish the repair.

Monday, December 12, 2005

hello


From Exoticars USA, in Frenchtown, NJ: restoration of exotic cars - , Italian and English exotics sportcars including: Ferrari, Lamborghini, Maserati, Aston Martin, Cobra. We promise some pretty interesting images of extraordinary cars undergoing transformation. Blogging by Randy Tartanian, blog maintenance by Sandy de Groot.